
How to Uninstall W3 Total Cache Plugin Manually
W3 Total Cache is one of the most popular cache plugins for WordPress. It’s free to use and most importantly helps to boost website’s performance.
However, sometimes, the plugin causes several issues, such as broken page errors, conflict with other plugins, even causing website crashes. Some hosting companies have blacklisted the plugin as it may cause various security and performance issues on websites.
If you are finding out that W3 total cache plugin is not very helpful and its causing issues, then it’s best to completely uninstall the plugin. In doing so it’s very important to delete the stored files that the plugin has created or it may produce even more issues in the future.
Here's how to properly uninstall W3 total cache plugin and also delete the stored files that the plugin created on your server.
Step 1, Clear All the Plugin’s Caches
The first thing you need to do is clear all the caches. It’s very simple with the W3 total cache plugin.
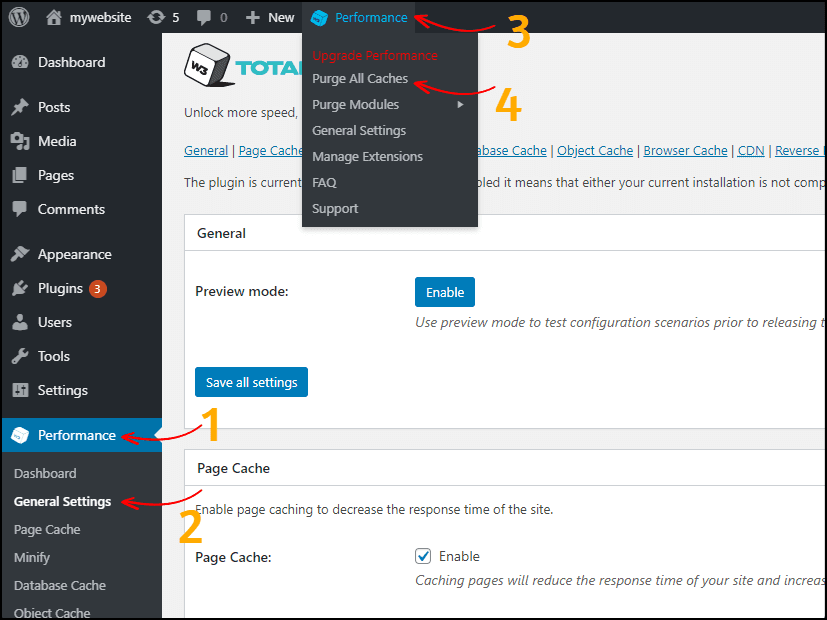
Log in to your WordPress dashboard. At the top of the page, you will see the Performance button. Hover your mouse over the option and a new menu will appear.
From there, click on the “Purge All Caches” option and it will clear all the caches.
Here’s a screenshot below for more details.
Step 2, Turn Off All Caching under General Settings
From your WordPress dashboard, go to the Performance menu and then General Settings. In the general settings Disable the following options:
Preview mode: Disable
Page Cache: Disable
Minify: Disable
Database Cache: Disable
Object Cache: Disable
Browser Cache: Disable
CDN: Disable
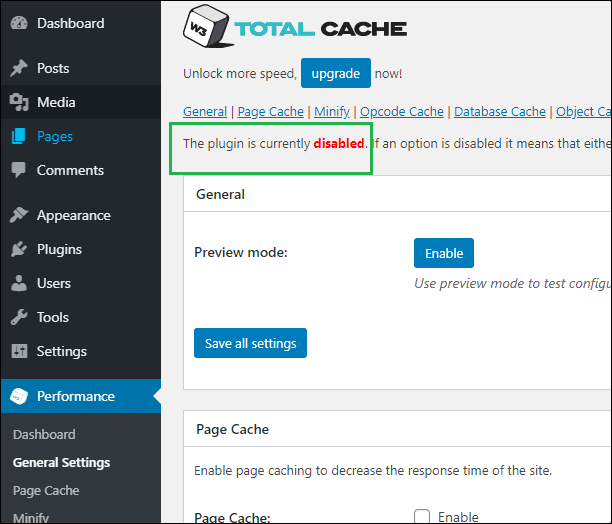
Once disabled the options, click on the Save all settings button. It will disable all the caching functionality in your site.
At the top of General Settings, you will see a message “The plugin is currently disabled“.
Step 3, Deactivate and Delete the W3 Total Cache Plugin
Now go to Plugins > Installed Plugins. Find the W3 Total Cache plugin and deactivate the plugin.

Once Deactivated, Delete this plugin.
4. Delete the W3 Total Cache Files from WP-Content (If available)
Like other cache plugins, the W3 total cache plugin also stores its data in the WP content folder.
To delete the files and folders, login to your hosting cPanel account and go to the root directory where your WordPress was installed.
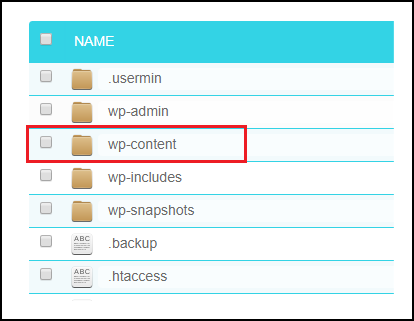
Then find the WP-Content folder and delete the followings:
- W3 total-cache-config.php
- advanced-cache.php
- db.php
- w3tc-config
- and also the “cache” folder
Don’t worry if you don’t see all the files.
Step 5, Check the .htaccess file
Finally, you need to check whether the W3 Total Cache plugin’s rules are still stored in the .htaccess file. The .htaccess file can be found in the root directory.
It looks like # BEGIN W3TC [caching type]” and “# END W3TC.
If the lines are present in your .htaccess file, carefully delete them and save the file.
Done! you have successfully Uninstalled W3 Total Cache Plugin.
Need help? We're always here for you.
