Detailed Instructions
Step 1: Download and Extract
Download and unzip the WordPress package from https://wordpress.org/download/.
- If you will be uploading WordPress to a remote web server, download the WordPress package to your computer with a web browser and unzip the package.
- If you will be using FTP, skip to the next step – uploading files is covered later.
- If you have shell access to your web server, and are comfortable using console-based tools, you may wish to download WordPress directly to your web server using wget (or lynx or another console-based web browser) if you want to avoid FTPing:
- wget https://wordpress.org/latest.tar.gz
- Then unzip the package using:
tar -xzvf latest.tar.gz
The WordPress package will extract into a folder called wordpress in the same directory that you downloaded latest.tar.gz.
Step 2: Create the Database and a User
If you are using a hosting provider, you may already have a WordPress database set up for you, or there may be an automated setup solution to do so. Check your hosting provider’s support pages or your control panel for clues about whether or not you’ll need to create one manually.
If you determine that you’ll need to create one manually, follow the instructions for Using phpMyAdmin below to create your WordPress username and database. For other tools such as Plesk, cPanel and Using the MySQL Client, refer the article Creating Database for WordPress.
If you have only one database and it is already in use, you can install WordPress in it – just make sure to have a distinctive prefix for your tables to avoid over-writing any existing database tables.
Using phpMyAdmin
If your web server has phpMyAdmin installed, you may follow these instructions to create your WordPress username and database. If you work on your own computer, on most Linux distributions you can install PhpMyAdmin automatically.
Note: These instructions are written for phpMyAdmin 4.4; the phpMyAdmin user interface can vary slightly between versions.
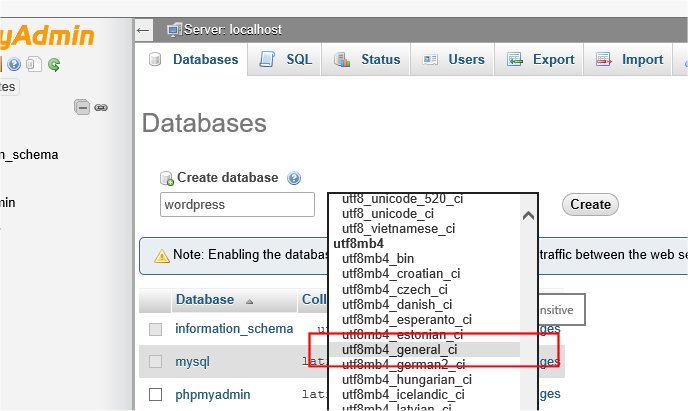
- If a database relating to WordPress does not already exist in the Database dropdown on the left, create one:
-
- Choose a name for your WordPress database: ‘wordpress‘ or ‘blog‘ are good, but most hosting services (especially shared hosting) will require a name beginning with your username and an underscore, so, even if you work on your own computer, we advise that you check your hosting service requirements so that you can follow them on your own server and be able to transfer your database without modification. Enter the chosen database name in the Create database field and choose the best collation for your language and encoding. In most cases it’s better to choose in the “utf8_” series and, if you don’t find your language, to choose “utf8mb4_general_ci”.
-
- Click the phpMyAdmin icon in the upper left to return to the main page, then click the Users tab. If a user relating to WordPress does not already exist in the list of users, create one:

-
- Click Add user.
- Choose a username for WordPress (‘wordpress‘ is good) and enter it in the User name field. (Be sure Use text field: is selected from the dropdown.)
- Choose a secure password (ideally containing a combination of upper- and lower-case letters, numbers, and symbols), and enter it in the Password field. (Be sure Use text field: is selected from the dropdown.) Re-enter the password in the Re-typefield.
- Write down the username and password you chose.
- Leave all options under Global privileges at their defaults.
- Click Go.
- # Return to the Users screen and click the Edit privileges icon on the user you’ve just created for WordPress.
- # In the Database-specific privileges section, select the database you’ve just created for WordPress under the Add privileges to the following database dropdown, and click Go.
- # The page will refresh with privileges for that database. Click Check All to select all privileges, and click Go.
- # On the resulting page, make note of the host name listed after Server: at the top of the page. (This will usually be localhost.)

Step 3: Set up wp-config.php
You can either create and edit the wp-config.php file yourself, or you can skip this step and let WordPress try to do this itself when you run the installation script (step 5). (you’ll still need to tell WordPress your database information).
Return to where you extracted the WordPress package in Step 1, rename the file wp-config-sample.php to wp-config.php, and open it in a text editor.
// ** MySQL settings - You can get this info from your web host ** //
DB_NAME
The name of the database you created for WordPress in Step 2.
DB_USER
The username you created for WordPress in Step 2.
DB_PASSWORD
The password you chose for the WordPress username in Step 2.
DB_HOST
The hostname you determined in Step 2 (usually localhost, but not always; see some possible DB_HOST values). If a port, socket, or pipe is necessary, append a colon (:) and then the relevant information to the hostname.
DB_CHARSET
The database character set, normally should not be changed (see Editing wp-config.php).
DB_COLLATE
The database collation should normally be left blank (see Editing wp-config.php).
Enter your secret key values under the section labeled
* Authentication Unique Keys and Salts.
Save the wp-config.php file.
Step 4: Upload the files
Now you will need to decide where on your domain you’d like your WordPress-powered site to appear:
- In the root directory of your website. (For example, https://example.com/)
- In a subdirectory of your website. (For example, https://example.com/blog/)
Note: The location of your root web directory in the filesystem on your web server will vary across hosting providers and operating systems. Check with your hosting provider or system administrator if you do not know where this is.
In the Root Directory
- If you need to upload your files to your web server, use an FTP client to upload all the contents of the wordpress directory (but not the directory itself) into the root directory of your website.
- If your files are already on your web server, and you are using shell access to install WordPress, move all of the contents of the wordpress directory (but not the directory itself) into the root directory of your website.
In a Subdirectory
- If you need to upload your files to your web server, rename the wordpress directory to your desired name, then use an FTP client to upload the directory to your desired location within the root directory of your website.
- If your files are already on your web server, and you are using shell access to install WordPress, move the wordpress directory to your desired location within the root directory of your website, and rename the directory to your desired name.
Step 5: Run the Install Script
Point a web browser to start the installation script.
- If you placed the WordPress files in the root directory, you should visit: https://example.com/wp-admin/install.php
- If you placed the WordPress files in a subdirectory called blog, for example, you should visit: https://example.com/blog/wp-admin/install.php
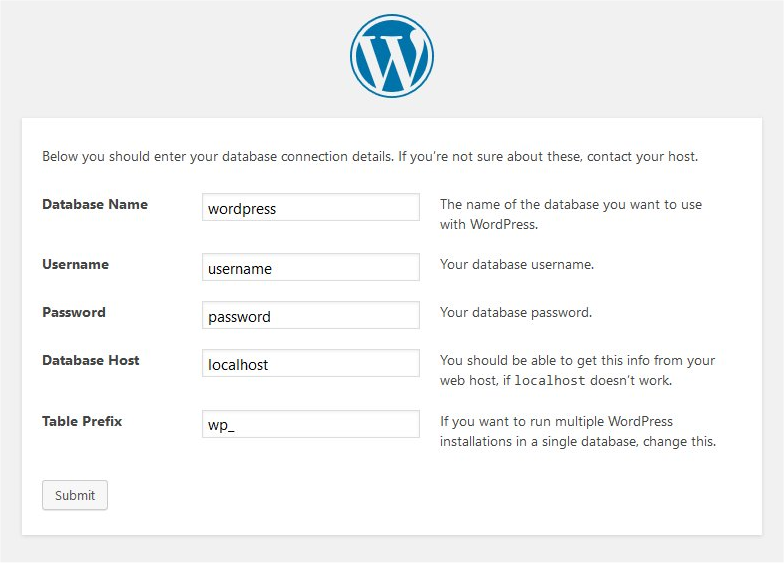
Setup configuration file
If WordPress can’t find the wp-config.php file, it will tell you and offer to try to create and edit the file itself. (You can also do this directly by loading wp-admin/setup-config.php in your web browser.) WordPress will ask you the database details and write them to a new wp-config.php file. If this works, you can go ahead with the installation; otherwise, go back and create, edit, and upload the wp-config.php file yourself (step 3).
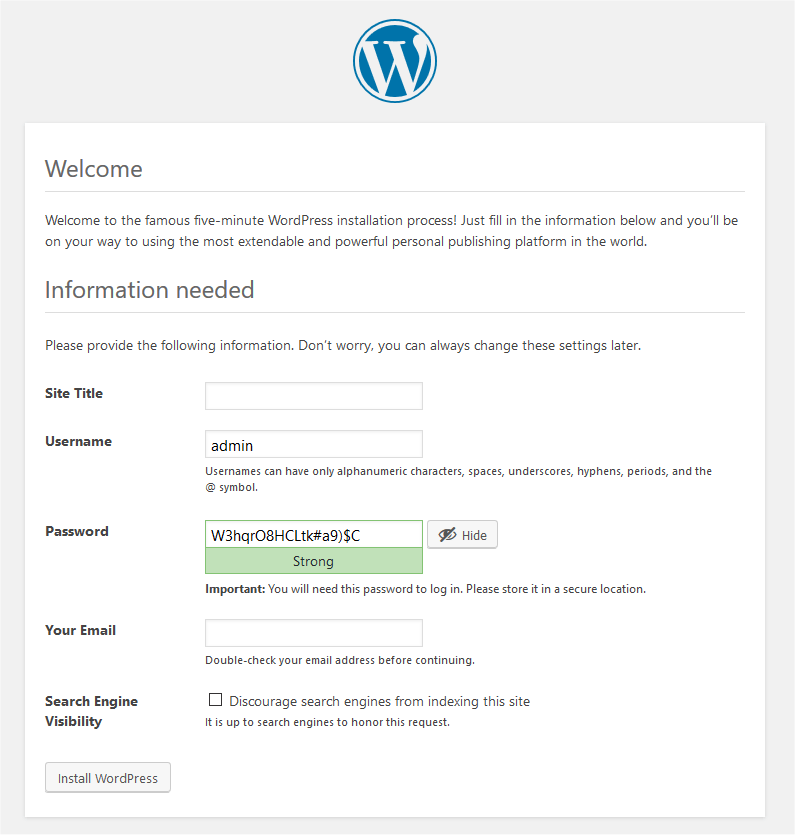
Finishing installation
The following screenshots show how the installation progresses. Notice that in entering the details screen, you enter your site title, your desired user name, your choice of a password (twice), and your e-mail address. Also displayed is a check-box asking if you would like your blog to appear in search engines like Google and DuckDuckGo. Leave the box unchecked if you would like your blog to be visible to everyone, including search engines, and check the box if you want to block search engines, but allow normal visitors. Note all this information can be changed later in your Administration Screen.
If you successfully install the WordPress, login prompt will be displayed.
Install script troubleshooting
- If you get an error about the database when you run the install script:
- Go back to Step 2 and Step 3, and make sure you entered all the correct database information into wp-config.php.
- Make sure you granted your WordPress user permission to access your WordPress database in Step 3.
- Make sure the database server is running.
Need help? We're always here for you.
