
Fix WordPress "Memory Exhausted" Error by Increasing PHP Memory Limit
On occasion, you’ll run into an error advising that you’ve hit your site’s "PHP memory limit". This could be confusing at first, especially since you won’t know what caused the problem or how to fix it. Fortunately, this issue is one of the simplest ones to resolve and should be achievable even for relatively new WordPress users.
Here we’ll explain what a WordPress memory limit error is, discuss why it might occur on your WordPress site, and then explain how to fix this issue. Even though WordPress is a pretty stable platform, it isn’t immune to errors. There are a number of common issues you might run across, such as the infamous ‘White Screen of Death’ or a site stuck in ‘maintenance mode’.
The good thing is that WordPress errors aren’t too difficult to troubleshoot and fix. This can can be intimidating to newcomers, especially since they offer little information about what’s gone wrong and how to approach solving the problem. Which brings us to one of the most frequently-encountered problems – the WordPress memory limit error. This can also be known as a "PHP memory limit error" and often looks something like this:
fatal error: allowed memory size of ____ bytes exhausted
The error can occur in a number of different circumstances. However, it’s most likely to arise when you take specific types of actions on your site, such as installing and activating a new theme or plugin Uploading images and other media to your site or migrating website from a server to another.
If you’ve run into this error on your own WordPress site, don’t worry. The reasons behind it are simple – let’s review them and see why this issue occurs.
Why You’re Seeing a WordPress Memory Limit Error on Your Site
The clue to the cause of the "memory limit" error is right there in the name. Just like anything else, your website requires a certain amount of memory in order to store all of its data. This includes its database and files, all of your content, code added by plugins and themes, among others.
This memory is provided by your hosting server. When you acquire a hosting server (plan), your site is allocated a specific amount of resources, including the memory used to store your site and enable it to function smoothly for visitors.
Naturally, having a higher-tier hosting plan provides more space and memory for your website. Many first-time site owners start out with basic shared hosting plans, which isn’t necessarily a problem. However, it does mean your allocated memory will be on the low side.
As your site grows larger or you start using more complex plugins and scripts, you may eventually hit your memory limit.
When it comes to WordPress, this means you’ll end up seeing a PHP memory limit error, and won’t be able to complete the action you were trying to take.
How to Check Your Current PHP Memory Limit
If you’re running WordPress 5.2 or above, you can use the Site Health tool to check what the current PHP memory limit is on your site. In your WordPress dashboard, go to “Tools” → “Site Health” → “Info” and scroll down to the server section. Here you can see that the PHP memory limit is on your server.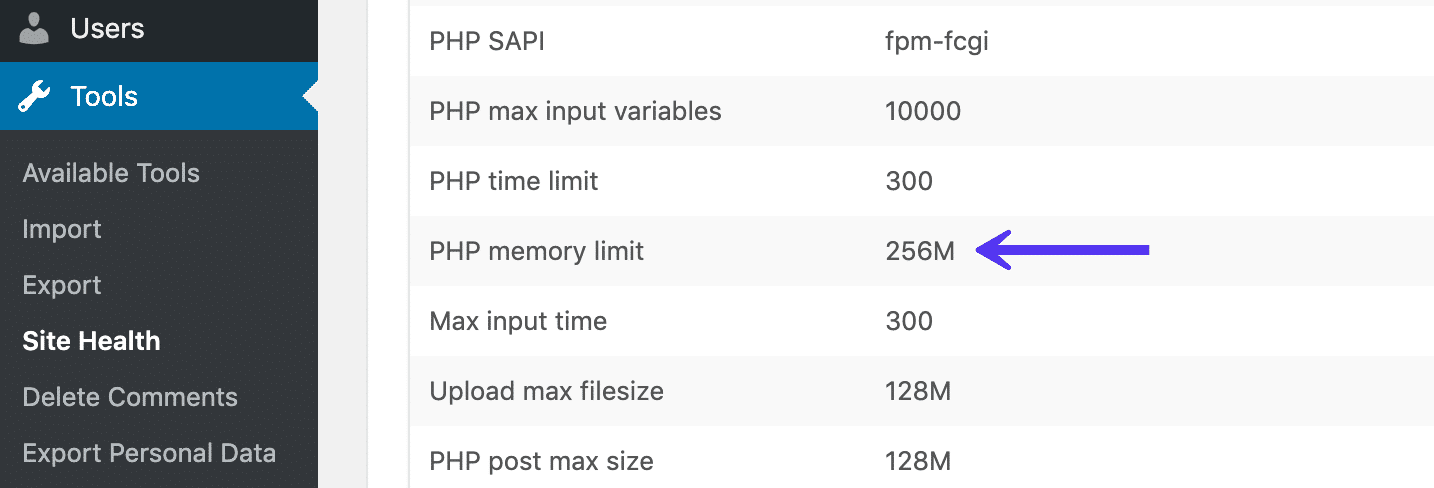
If the amount is low, say 32M, there’s ultimately only one fix for this issue: you need to increase the amount of memory allocated to your site.
How to Resolve the WordPress Memory Limit Error
Unlike many common errors, the WordPress memory limit issue is simple to troubleshoot. It has a very clear cause, so you won’t have to go through a whole lot of trial and error if you want to figure out how it can be fixed. For this you can increase the amount of memory allocated and fix the issue. See below.
Increase the PHP Memory Allocated to Your Website
It may seem simple, but sometimes the obvious solution is the best one. If your site has run out of memory, the easiest thing to do is increase how much memory it has access to.
Obviously, how far you’re able to increase the limit will depend on your hosting provider and plan. However, it’s not uncommon for your site to be using a smaller amount of memory than it actually has available.
Your site’s current memory limit is set in its wp-config.php file, and this may or may not match up to the limit allowed by your provider. The first step, therefore, is to try and increase your PHP memory allowance by editing the file.
Using an FTP Client or cPanel File Manager to Access Your Site’s Files
Increasing your site’s memory limit will require logging into your site directly, using Secure File Transfer Protocol (SFTP) or accessing your File Manager via cPanel. For FTP: If you’ve never done this before, you’ll first need to install an SFTP client – a program that enables you to connect to your site’s files on its server or you can acess your files via your hosting account cPanel "File Manger" where your files are located.
We recommend picking up FileZilla, which is free and relatively easy to get started with. Next, you can follow this guide to setting up FileZilla and using it to make a connection. You’ll need your site’s SFTP credentials, which you can usually find in your hosting account. If you run into trouble, you should be able to reach out to your provider, who can tell you where to locate your credentials.
Finding Your wp-config.php File
Once you have FileZilla set up and connected or accessing your files via cpanel "File Manger", you should be looking at a screen similar to the following:
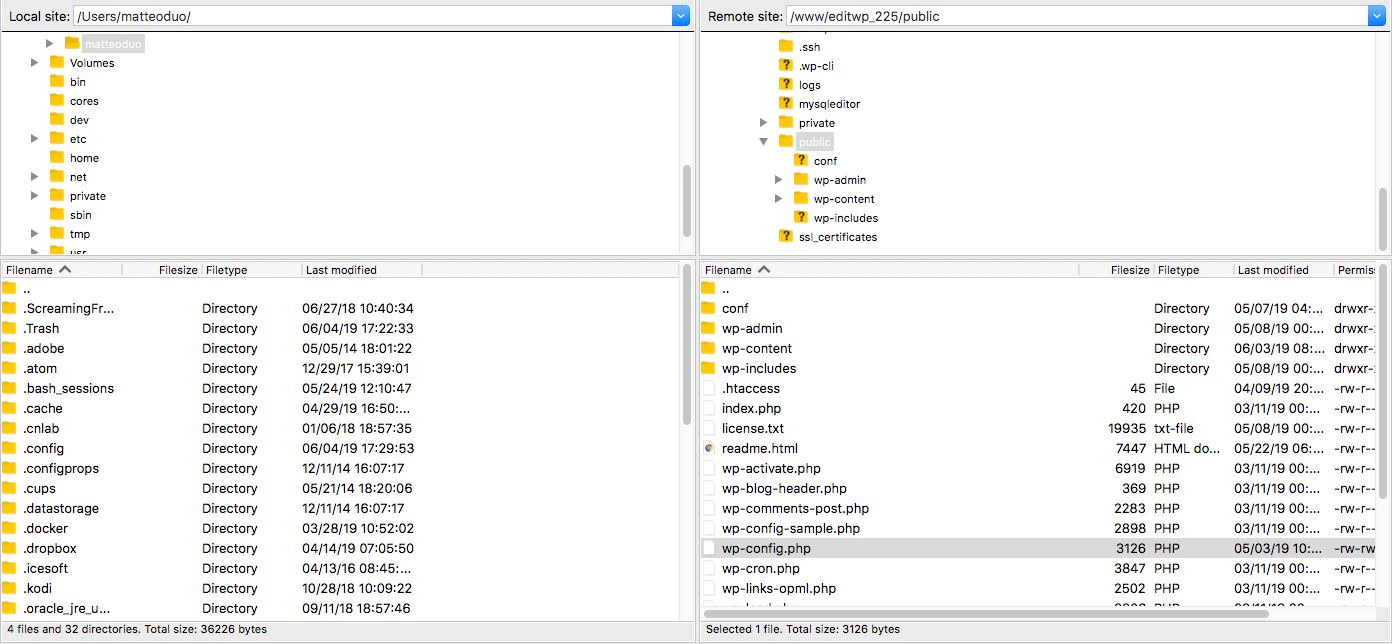
In the top-right quadrant, you’ll see a list of the folders that contain your site’s files. Look for your site’s ‘root’ folder, which is often either named after your site’s domain or is called public_html or www. Open this folder up, and look for a file called wp-config.php:

This file stores certain information about your site’s database and settings. Therefore, it’s important to be careful not to alter anything other than the specific line of code we’ll be looking at. In fact, it’s a good idea to make a backup of your site before proceeding any further, just in case you accidentally delete or change something important.
Increasing Your Site’s Memory Limit
With your backup in place, go ahead and open up your wp-config.php file. It should look something like this:
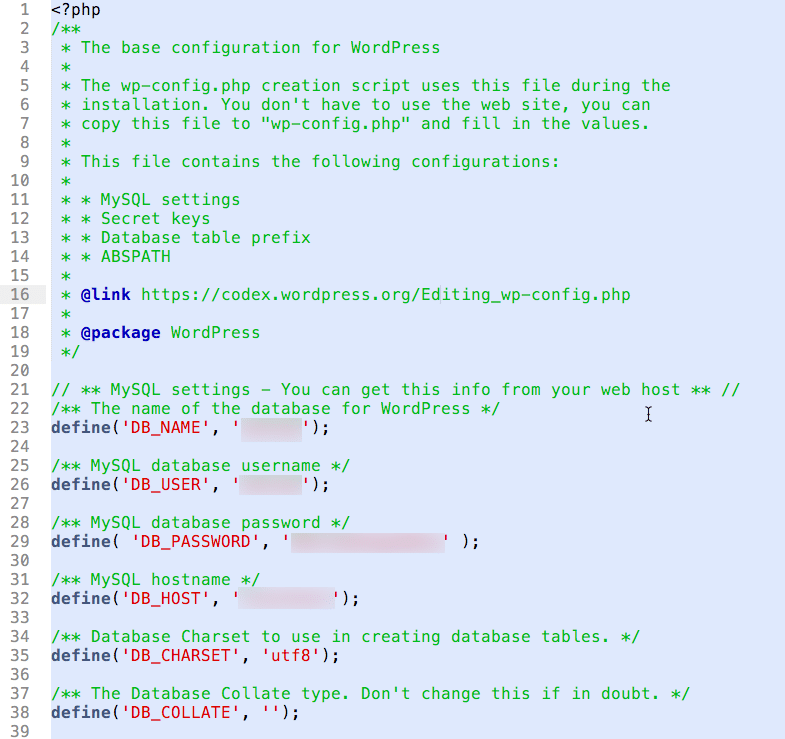
Then, look through the file for the following line:
define( 'WP_MEMORY_LIMIT', '256M' );
Note that the number may be different in your file, as it represents your site’s current memory limit. You may also not find this line at all.
If you do locate the line, go ahead and increase the number it contains. In most cases, 256 MB should be sufficient. If you don’t find the line, you can paste it in right before the part of the file reading: “That’s all, stop editing! Happy blogging.”
Then, save the changes to your wp-config.php file, and close FileZilla or your hosting File Manager. Open up your site, and try repeating the action you tried when you first encountered the WordPress memory limit error. If it no longer appears, you’ve fixed the problem.
If you still encounter the error, you can try opening up your wp-config.php file and increasing the memory limit further. However, if you try this a few times and it doesn’t work, then you may have reached the maximum limit allowed by your hosting provider. In this case, you’ll need to try a different approach.
Note: Some hosts may not let you access your site through an FTP client. In this scenario, you can often change your memory limit manually by using cPanel.
Need help? We're always here for you.
